
Daylilies are fantastic additions to any garden. And because there are literally thousands of varieties to chose from, it can also become an addictive passion. Searching for and finding that elusive plant…the perfect color, the right bloom time…it’s all part of being a daylily fanatic. And a common way to get those got-to-have plants are mail order growers.
Many daylily growers dig and ship their plants across country, on a daily basis during the growing season. Plants are dug in the morning, packed and sent to you that afternoon. You receive bare-root fans of daylilies to plant in your garden.
There are a few steps to take to ensure your new additions get a good start. Let’s walk through how to plant mail order daylilies. In no time, you’ll have that perfect daylily blooming in your garden.
- Difficulty:
- Moderately Easy
Instructions
Things You’ll Need
- Mail ordered daylily fans
- Bucket of water
- Shovel
- Mulch
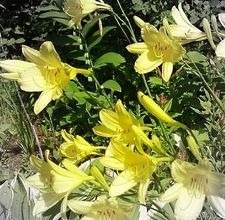
 Fans upon arrival; double fan on the right
When your package arrives, or when you get home to your daylily delivery, open the package and inspect the fans. You should have fans that look similar to the ones in the photo. Daylilies are extremely hardy and can withstand being out of the earth for long periods with little impact to their overall health.
The leaves should be cut down into approximately four to six inch fans, which helps the plant from becoming overstressed. The less foliage the plant has to care for, the better. Since daylilies grow from tubers, and not daylily bulbs, they are extremely hardy. The tubers should be free any debris. They may be dry looking, but should be firm.
Look for any signs of disease, bugs, mushy tubers, or anything that looks suspicious, including a foul smell. The area where the leaves join the tuber should be firm; the leaves should not be pulling away from the tuber. The leaves should be green, although some smaller leaves at the base of the crown may have turned yellow.
If you find anything that indicates less than healthy plants, take some digital photos and contact the grower immediately. The longer you delay in contacting them, the less likely chance you have of refund or replacement. Some growers guarantee their delivery; look for those when you order.
- So, assuming you have healthy plants…and we all want that…let’s go plant, right? Not quite. Take those tubers and submerge them in a bucket of tepid water. Let them rehydrate a little before putting them in the garden. Don’t soak them any longer than 30 minutes or so though; any longer can cause the tubers to become over saturated and can lead to an accumulation of bacteria or the tubers to rot.
- While those tubers are soaking, prepare the place where they are going to be planted. Dig a hole deep enough so the crown (where the leaves join the tubers) is at or slightly below soil level. Water the newly dug hole well, so your daylily tubers are going into a well watered new home. If your soil is very heavy clay, rocky, or extremely dry and hard, dig down a few extra inches, remove that soil and fill the hole with loose dirt or compost. The newly planted rootlets and tubers will have an easier time getting established if they don’t have to work to get through the soil.

Okay, now you can plant. Place the tubers in the hole, arranging them over a mound of dirt in the center of the hole so they fan out and aren’t bunched up. You’re encouraging them to grow out and down. Fill the hole with soil up to the top.
If you have a time release fertilizer, you can add that to the soil you’re filling the hole with. Don’t place it in the hole with the tubers; fertilizers can burn rootlets if it comes in direct contact with them.
 Stepping in the daylily
Water well and then gently "step" them into their new home. Place a foot on either side of the crown and walk your way around the plant, stepping down firmly to eliminate air pockets in the soil, without stepping on the plant. Air pockets are deadly to newly planted plants, of any kind.

Water well again and cover the area around the daylily with the mulch of your choice. Water the mulch as well.
- Check your newly purchased daily for the next few weeks. Water as needed, but don’t over water. Some of the leaves on the outside of the crown may yellow and fall off. That’s normal; you can remove those as well with a small scissors.
In a few weeks, you should see new growth coming from the center of the crown, which means you have a happy, healthy new daylily addition to your garden, ready to provide you with years of lovely blooms.
Deprecated: strpos(): Passing null to parameter #1 ($haystack) of type string is deprecated in /home/agriviek8Qv/agriviet.net/public_html/wp-includes/comment-template.php on line 2522