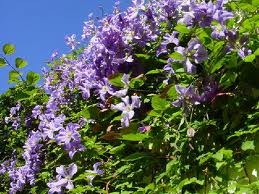

Whether you grow large, summer blooming clematis or smaller, fall-blooming types, clematis are spectacular vines that are appropriate in a variety of landscaping settings. Clematis work well on fences or patios to create privacy, or rambling over a trellis or mailbox. Once you plant one clematis, you will probably want more. Clematis grow slowly from seed, so most gardeners prefer to propagate them by layering stems in the soil or through cuttings. Taking cuttings is a simple process, but the roots grow slowly.
- Difficulty:
- Moderate
Instructions
things you’ll need:
- Coarse builders sand
- Peat moss
- Chlorine bleach
- 4-inch pots
- Sharp knife
- Rooting hormone
- Large plastic zip-top bag
- Mix a rooting medium by mixing two parts sand with one part peat. Use new containers or sterilize old containers by washing them in a solution of one part chlorine bleach to 10 parts water. Young, tender cuttings are susceptible to disease and need sterile conditions for successful rooting.
- Cut a 6-inch piece of stem with a sharp knife from an existing clematis in May or June. Select a healthy, vigorous stem at the top of the plant. Cut the stem directly beneath a healthy leaf node. Remove all the leaves from the bottom half of the stem.
- Dip the bottom end of the stem in rooting hormone. Rooting hormone powder, which is available at nurseries and garden centers, promotes root development, encouraging fast, healthy growth.
- Insert the cutting into the starting medium up to the first leaves. Water the medium so the soil is evenly moist, but not soggy. Place the pot in a large plastic bag and seal the top to create a miniature greenhouse. The plastic bag will create the humid conditions necessary for good root formation. Set the plant in a warm location out of direct sunlight, which creates too much heat and can burn the plant.
- Check the plant at least weekly, adding more water if the rooting medium seems dry. Remove the cutting from the medium after two months and inspect it for white roots. If the roots have formed, transfer the cutting to a larger container filled with potting mix. Place it in a sunny location and keep it watered. Fertilize it with a balanced 10-10-10 fertilizer. Plant the clematis in the ground when it stands at least 6 inches high, but no later than early September, so it has time to become established before winter freezes.
- Replace the cutting in the rooting medium for a few more weeks if no roots are evident. Large-flowered clematis may take as long as four months to root. Pot up any clematis that roots after September and keep it in the house until the following spring.
Tips & Warnings
-
Immediately insert the cutting into the rooting medium so it doesn’t dry out.
Deprecated: strpos(): Passing null to parameter #1 ($haystack) of type string is deprecated in /home/agriviek8Qv/agriviet.net/public_html/wp-includes/comment-template.php on line 2522