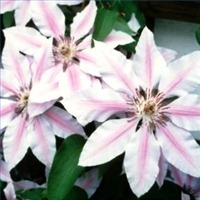

Clematis is a woody deciduous vine that will wrap its tendrils around a trellis or fence. Clematis includes more than 250 species with a variety of sizes, shapes, colors and blooming times. All clematis types boast showy flowers, some as large as 10 inches in diameter. Some clematis are hardy enough to survive cold weather in USDA hardiness zone 3. Clematis isn’t difficult to propagate. Take cuttings from a healthy, mature clematis vine during the summer.
Difficulty: Moderate
Instructions
Things You’ll Need:
- Planting container with drainage hole
- Sand
- Perlite or vermiculite
- Knife or pruners
- Powdered rooting hormone
- Waxed paper
- Clear plastic
- Rubber band
- Small container
- Water-soluble fertilizer for blooming plants
-
Fill a container with a mixture of half sand and half perlite or vermiculite. Use a container with a drainage hole in the bottom, as soggy soil will rot the clematis cuttings.
-
Cut a stem tip from a vigorous clematis vine, using a sharp knife or pruners. The stem should be about 5 or 6 inches long.
-
Remove any flowers or buds from the clematis cutting. Pull the leaves off the lower half of the vine.
-
Sprinkle a small amount of powdered rooting hormone on a piece of waxed paper. Roll the bottom inch of the clematis vine in the powder. Discard any leftover rooting hormone when you’ve finished.
-
Poke the clematis cuttings into the potting medium. Several cuttings can be planted in a container, as long as the leaves aren’t touching.
-
Water the potting mixture lightly to settle the clematis cuttings. Cover the container with a piece of clear plastic, then seal the plastic securely with a rubber band. If the container is small, it can be covered with a clear plastic bag.
-
Place the clematis cuttings in a bright place away from direct sunlight. Avoid sunny windows, as the magnified light can scorch the cuttings.
-
Check the potting mixture once or twice every week. Open the bag and water lightly if the potting mixture feels dry. If water runs down the inside of the bag, poke a few holes to allow more air circulation.
-
Dig up a stem carefully with a table knife after three to four weeks. If the roots are at least an inch long, each cutting can be removed from the plastic and planted in its own small container. Plant each rooted clematis cutting at the same depth it was planted in the first container.
-
Move the young clematis vines gradually into bright, direct sunlight. Place them in sunlight for two hours for two or three days. Gradually increase the time until the young plants are in bright sunlight all day.
-
Water the clematis vines whenever the top of the soil feels slightly dry. Allow the water to run through the pot. Never allow the clematis’ container to stand in water, as the soil should be damp but not soggy.
-
Fertilize the clematis vines every other month, using a water-soluble fertilizer for blooming plants. Always apply fertilizer according to the specifications on the label.
-
Plant the young clematis vines outdoors in the spring, after all danger of frost has passed.
Deprecated: strpos(): Passing null to parameter #1 ($haystack) of type string is deprecated in /home/agriviek8Qv/agriviet.net/public_html/wp-includes/comment-template.php on line 2522