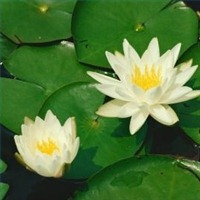

The water lily is a staple plant for home water gardens. Water lilies are hardy, attractive flowering aquatic plants that are easy to grow. Inflorescence varies by cultivar but common flower colors include white, yellow, blue and pink — providing vibrant color to water gardens through the summer. In addition, water lilies provide shelter for many aquatic animals, including fish, frogs and insects. Whether it’s a small above-ground water garden or a large in-ground pond, water-lily ponds can be constructed to fit your landscaping needs.
Difficulty: Moderate
Instructions
Things You’ll Need:
- Shovel
- Pond liner
- Level
- Plastic planting pots
- Aquatic plant fertilizer
- Small gravel
- Large rocks
- Stakes
- String
-
Select a sunny location on your property for the pond. Avoid placing it near trees, because the roots may grow into the pond and the foliage will collect on the bottom, causing discoloration and excess nutrients. According to the University of Minnesota, water lilies require at least five hours of sunlight each day — though hardy water lilies can survive with less — so it is important to locate the pond in an area with plenty of sun.
-
Determine the size and shape of your water lily pond. If you are planning on using a preformed plastic pond liner, your choices are limited. However, if you are using a plastic liner, the shape and depth of the pond is up to you. Water lilies grow best at a depth of 6 to 18 inches, according to the University of Vermont.
-
Mark out the pond area with stakes and string before you begin digging. Adjust the size and shape as needed.
-
Excavate the pond location with a shovel and place all excess earth around the edge of the pond. Keeping excess earth nearby will help with the final touches later on and can also be used to create additions to your lily pond such as bog gardens or waterfalls.
-
Check the slope of the base of the pond using a level. If planting with a preformed plastic liner — whether in-ground of above-ground — it is important to ensure that the base of the pond is level so that the water level of the pond appears level when full. For in-ground ponds with plastic liners, having a level base is less important, but it will improve the stability of water lilies planted in the pond.
-
Place the plastic liner or preformed plastic pond in the location and use the excess earth to fill any gaps around it.
-
Landscape around the edge of the pond using large stones. In addition to providing a natural appearance, large stones help hold the plastic liner in place.
-
8Fill the pond and monitor closely for any leaks. Allow the pond to sit for several weeks before adding plants. Aging the pond will help remove any chemicals from the water and stabilize the water temperature.
Constructing the Pond
Planting Water Lilies
-
Fill large plastic potting plants with 2 to 3 inches of small gravel to add weight to the potting container.
-
Add a loamy clay soil mix to the potting container and place a water lily tuber in the pot with the sprout just barely covered by soil. Water lilies are commonly sold as tubers, which should be placed at a 45-degree angle in the soil to facilitate proper development.
-
Insert a few aquatic plant fertilizer plugs around the water lily and add a final thin layer of gravel to help contain the soil. Fertilizer plugs are composed of a slow-release fertilizer mix that provides nutrients to water lilies through the growing season.
-
Place the water lily with the planting container in your pond. Tubers will develop faster if initially placed in shallow areas of the pond. Water lilies planted in sunny locations will develop numerous floating leaves — lily pads — in the first season and will grow thicker each year.
Deprecated: strpos(): Passing null to parameter #1 ($haystack) of type string is deprecated in /home/agriviek8Qv/agriviet.net/public_html/wp-includes/comment-template.php on line 2522