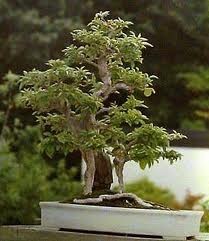
 Overview

Like any naturally growing tree, the bonsai tree can become damaged. Broken branches and other tree damage can take a toll on the tree. Immediate repair and care of the damaged tree will help the bonsai revive itself, promote healthy healing and allow it to continue on through its lifespan.
Step 1
Carefully inspect the tree before beginning the repair process. Look for all the damaged areas including cracks in the trunk, broken branches and stems and damaged foliage.
Step 2
Begin the bonsai repair process with pruning. Use sharp, sterile pruning shears or scissors to trim away any dead, dying or damaged stems and branches. Use an angular cut when pruning to promote rapid healing. Never tear or rip the branches and stems as this will create further tree damage.
Step 3
Gently pinch away any wilted, dead or damaged foliage. Use the index finger and thumb to grasp the stem and snap away from the branch. Remove the branch holding the foliage if the branch feels soft and weak.
Step 4
Remove the bonsai tree from its container and place it on a flat surface. You may choose to cover the surface with a mat or newspaper prior to laying the bonsai. Gently remove the excessive soil from around the bonsai’s root system.
Step 5
Gently comb out the bonsai’s root system. Use sharp, sterile scissors to trim the root system of the tree. Trim away any dead, dying or damaged roots first, about a third of an inch past the damage. Trim no more than one third of the entire root system, cutting the thicker, larger roots over the finer, fibrous ones.
Step 6
Repot the bonsai tree in a new container. Select a container that contains a good drainage system and that has a depth that is equivalent to the diameter of the bonsai’s trunk. Select a plastic container or a clay one since plastic containers maintain more consistent moisture levels. If a wooden container is selected, ensure that the container is untreated and rot resistant.
Step 7
Prepare the soil for the bonsai. Mix nutrient rich soil with equal amounts of organic compost and fine, clean sand to promote a sandy loam. Line the bottom of the container with a layer of the prepared soil. Place the bonsai tree in the center of the container and fill the container with the remaining soil. Make sure that there are no roots exposed. Firmly press the soil around the bonsai to secure the tree’s position.
Step 8
Place the newly repotted and repaired bonsai tree into a sink. Fill the sink with tepid water until the water level rests about one inch past the tree’s soil line. Allow the potted bonsai to rest in the water until all of the air bubbles cease to rise.
Step 9
Remove the bonsai tree from the water and allow it to rest until the water no longer drains from the bottom of the container. Place the bonsai is a warm, well ventilated area that receives at least six hours of partially shaded to full sunlight each day. Adjust the sunlight intake and positioning for bonsais that require partially shaded to full shade.
Deprecated: strpos(): Passing null to parameter #1 ($haystack) of type string is deprecated in /home/agriviek8Qv/agriviet.net/public_html/wp-includes/comment-template.php on line 2522