
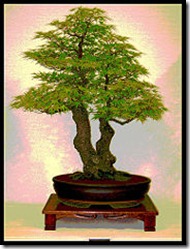
 Japanese Maple Bonsai

-
Select a branch with a pleasing shape and structure. It can be up to the diameter of your little finger.
-
Assemble the items needed. These are listed in the "Things You’ll Need" section below.
-
Cut around the branch where you want roots to sprout. Make a circular cut through the bark and into the hardwood underneath.
-
Make a duplicate cut. Make this about two branch widths below the first cut.
-
Make a straight cut. This cut should connect the first two cuts.
-
Peel off the bark between the first two cuts. The bark should peel off fairly easily. Make sure none of the cambium layer (the green layer under the bark) is left.
-
Dust the top cut with rooting hormone. Wrap the area with the wet sphagnum moss, then wrap it with plastic and tie in place.
-
Keep the moss wet. After several weeks, you should see roots through the plastic.
-
Separate the tree. When the roots start to thicken and turn brown, separate your new tree by cutting it off below the new roots.
-
Place small pebbles for drainage in the bottom of a pot.Partially fill the container with top soil. Unwrap the plastic and without disturbing the roots, plant your new tree, adding additional soil as needed.
-
Insert a stake. This will keep the tree from moving and damaging its delicate roots.
-
Enjoy your new tree!
1 thought on “Japanese Maple Bonsai”
Deprecated: strpos(): Passing null to parameter #1 ($haystack) of type string is deprecated in /home/agriviek8Qv/agriviet.net/public_html/wp-includes/comment-template.php on line 2522