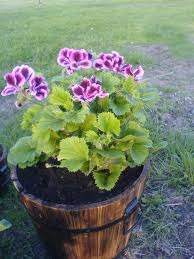

Old-fashioned summer blooming zonal geraniums (Pelargonium spp.) are popular in mixed containers because they add a reliable splash of color and are so easy to care for. I’m partial to Martha Washington-type geraniums, as well as fancy leaf types like "Crystal Palace Gem" and scented geraniums, especially the fuzzy leafed, peppermint one! An easy way to save your favorite geraniums from year to year, and make more plants to share with friends, is to take cuttings. The process is really simple and fun. Here’s how to do it.
- Difficulty:
- Moderately Easy
Instructions
Things You’ll Need
- Plastic four inch pot
- Sharp knife or razor blade
- Perlite
- Potting mix
- Plastic bag
- Chopsticks
- Select a healthy, non-flowering stem that is about 4 inches long and has at least three leaf nodes-the swollen spot where the leaf adjoins the stem. Use a sharp knife like an Xacto or a razor blade to remove the stem. Make the cut right below a node. Remove any leaves from the bottom inch of the cutting.
- Geraniums have succulent stems and they will rot if you plant them into moist soil right away. Instead, stick the leafy end of the cutting into a plastic bag to prevent it from wilting and let the cut end air dry for 24 hours.
- For each cutting you’ll need one 4-inch pot that has a drainage hole. If you’re using recycled plastic nursery pots be sure to disinfect them by scrubbing them out with hot water and soap and then soaking them in a 10 percent bleach solution for half an hour. Rinse the pots in clean water and allow them to air dry before planting.
- Cuttings grow best in light, fluffy soil. To make a nice, lightweight growing medium, mix together perlite and soilless potting mix in a 1:1 ratio. Pre-moisten this soil by adding water until the mix is damp, but not soggy. Then fill all of your pots up with the mix, leaving at least a ½ inch of space between the top of the soil and the rim of the pot.
- Make a hole in the middle of each pot that is 1 inch deep. Pick up the cutting by its leaves and stick it into the hole, making sure that no leaves will be buried in the soil. Gently press the potting medium around the stem.
- Place a label in the pot that includes the name of the geranium variety and the date the cutting was planted. Place a disposable bamboo chopstick in each corner of the pot and slide a plastic bag over the sticks. This helps keep the humidity high around the cutting and prevents it from wilting. Place the tray in a bright south or west facing window.
- Check the potting soil daily and make sure that it stays evenly moist, but not soggy, which could cause the cutting to rot. Roots should develop within two to four weeks. To find out if your cutting has rooted, give it a gentle tug. If you feel a bit of resistance, roots have probably started to grow. When your cutting has two new sets of leaves you can transplant it into a bigger pot.
Deprecated: strpos(): Passing null to parameter #1 ($haystack) of type string is deprecated in /home/agriviek8Qv/agriviet.net/public_html/wp-includes/comment-template.php on line 2522