
Tulips are hardy bulbs that bloom outdoors in spring only after experiencing temperatures of 35 to 50 degrees for 14 to 15 weeks. They can also be placed in pots and forced to bloom at other times of the year. To provide quick color, you may transplant potted tulips into your garden in the spring just before they bloom. However, if your goal is to transplant potted tulips in the fall and enjoy spring blooms the following year, you will need patience and a little luck.
- Difficulty:
- Moderate
Instructions
Things You’ll Need
- Potted tulips
- Spade or shovel
- Potting soil
- Scissors
- Water
- Water-soluble fertilizer
- Bulb planter or narrow trowel
Spring Transplanting
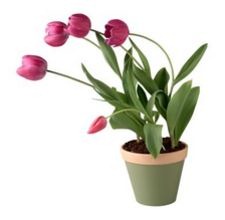
- Purchase potted tulips that have healthy, green leaves. Select specimens with tightly closed buds.
- Select a spot in your garden that will receive full sun, and use a spade or shovel to dig a hole for each potted plant. Make the hole twice as large in diameter and depth as the pot. Add a layer of rich soil, such as potting soil, to the bottom of the hole.
- Tap the pot against your hand to loosen the soil. Tip the plant into your hand. Gently loosen the soil around the bulbs and place the plant in the prepared hole. The top of the plant should be about half an inch lower than the surface of the soil. Add more potting soil, if necessary. Crumble loose soil around the perimeter and press firmly to settle the plant in the ground.
- Water the newly planted tulips thoroughly. In a few days, the buds should start to open, providing your garden with spring color.
Fall Transplanting
- Cut off the flower stalks after the tulips have quit blooming. The foliage produces nourishment for the tulip bulbs, so avoid damaging the leaves, as they should continue to grow as long as possible.
- Place the pots in a cool spot in the sun. Fertilize the tulips with a water-soluble commercial fertilizer, or use liquid kelp or fish emulsion. Water the pots as needed to keep the soil from drying out.
- Stop fertilizing and cut back on watering when the leaves start to die down. When the leaves have died, move the pot to a location where it will remain dry.
- Remove the bulbs from the pot In late September or early October. Gently pull away the soil and separate the bulbs. Snip off any remaining flower stalks. Keep the firm, healthy bulbs and toss the rest.
- Dig a hole 6 inches deep for each bulb, using a bulb planter or narrow trowel. Drop in the bulb, pointed end up, and fill the hole with soil. Press firmly to settle the bulb and water thoroughly.
Tips & Warnings
-
After transplanting bulbs, don’t be concerned if all you get the first spring is foliage. It might take another year for your efforts to be rewarded with blooms.
Deprecated: strpos(): Passing null to parameter #1 ($haystack) of type string is deprecated in /home/agriviek8Qv/agriviet.net/public_html/wp-includes/comment-template.php on line 2522