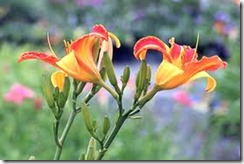
 Today, daylilies are "common as dirt" in our gardens, but it was not always so. The first tawny hemerocallis appeared in America as small blooms on long scapes that grew along rural roads. Gardeners adopted these hardy plants and through hybridization and propagation have produced a hardy perennial that comes in a wide variety of sizes and colors, some of which bloom for most of the summer. Propagate daylilies one of two ways; try foolproof division or be adventurous and grow plants from seed.
- Difficulty:
- Moderately Easy
Instructions
Things You’ll Need
- Garden fork
- Hand trowel
- Compost
- Sharp knife
- Plastic bags and string
- Milk cartons or planting flats
- Sterile growing medium
- Spray bottle
- Water
Divisions
- Divide daylily clumps when the center starts to lose its vigor and blooms decrease. Dig under the root mass and lift the whole plant with a garden fork.
- Examine the clump in a cool, shady place; there should be several crowns within its structure. Pull the thick "divisions" apart just far enough to see how many new plants are there.
- Dig holes to set new plants and line them with a mixture of garden soil and compost or humus. Each hole should be about a foot deep and 18 inches in diameter or one and a half times the size of the division.
- Pry the crowns completely apart, cutting any connections with a sharp knife and trimming any raggedy roots. Try not to damage any rhizomes—the thick roots that bunch right under the plant. Plunge clumps into tepid water if necessary to loosen the divisions.
- Spread the roots of each division around a cone of soil in the bottom of each hole and fill the hole with soil, adjusting the division as the hole is filled so that it sits at the same depth as it was growing in the clump. Water well when all of the divisions have been planted.
Seeding
- Collect daylily seeds at the end of the season from ripe seed pods. Green pods on the end of the scapes will turn brown and dry. Tie a plastic bag around dry pods to catch seeds which will shoot out when the pods break open.
- Plant seeds about one and a half times their diameter—between 1/8 and 1/4 inch deep. Sow seeds in sterile planting mix or soilless planting medium and keep moist (not wet) with a mister until the seeds germinate—two or more weeks.
- Transplant seedlings to flats or small pots and place in a sunny window. Keep the soil most or put pots on a bed of gravel to water through the bottom of the pot—the roots will seek the water.
- Move 4- to 6-inch plants to a nursery bed—a sheltered space in the garden—in the spring and allow them to grow their first year protected from grazing rodents and marauding birds.
- Move plants to their homes in the garden when they have developed strong roots and a well-structured fan or fountain of grassy leaves. It will take a year or more for the daylily to flower, depending on variety.
Tips & Warnings
-
Daylilies are remarkably undemanding plants but they appreciate a good watering after transplanting and during flowering. Babies do not need to be fertilized but adult plants respond well to a feeding of slow-release garden fertilizer in the spring or after flowering. Always water well after fertilizing your daylilies.
-
Seeds that are harvested may not produce plants that look like their parents; insects do not limit their attention to one variety of one species of plant. Seeds that are ordered from a daylily society or garden-supply company, though, should be true to type. Harvested seeds should be started in the fall; "Bought" seeds can be started as soon as they are received.
-
Daylilies can be moved anytime by an experienced gardener but mid-summer tends to be too hot and dry for guaranteed success. Fall is a good time to propagate daylilies; divide them as they begin to die back. Divide them in early spring before the mound has formed to minimize damage to leaves.
-
Direct sunlight or "bottom heat" (from a radiator) will make water evaporate faster, so shade the seed nursery or make a "greenhouse" out of a plastic bag.
-
Never pack down soil when planting divisions. Compacted soil denies both water and air to roots which need both to overcome transplant shock.

Deprecated: strpos(): Passing null to parameter #1 ($haystack) of type string is deprecated in /home/agriviek8Qv/agriviet.net/public_html/wp-includes/comment-template.php on line 2522