
Daylilies and irises flower freely when they are first planted. But after a few years the plants can become dense and crowded. Eventually, the the plant suffers and loses energy. Less energy means fewer flowers. Dividing the plants is good for the plant and the gardener. Irises and daylilies will thrive and you will have more plants.
- Difficulty:
- Easy
Instructions
Things You’ll Need
- Established daylilies
- Established Iris
- Garden fork
- Long handled garden spade
- Sturdy work boots
- Sturdy large screwdriver
- Garden scissors
- Sharp knife
- Fertilizer
- Mulch
Dayliles
- Divide daylilies in spring in cold-winter climates and in the fall in the south. Dig up large clumps of mature daylily plant with a garden fork and spade. Start with a spade to dig around the plant, then remove the plant with a garden fork to avoid damaging the tuberous roots.
- Shake off any soil clinging to the roots and lay the plant on the ground. If your plant is very large, halve the plant using a garden fork or a spade. Put the tool on top of the root ball, at the base of the foliage, and cleave or pry the mass apart.
- Make individual subsections from the larger plant chunks. Drive a screwdriver down between the natural divisions of leaf clusters. Break the clusters cleanly apart.
- Discard damaged or withered sections. Cut leaves on newly sectioned plants to 3 inches and trim any damaged roots. Dig new holes for the sections and form a soil mound in the center of each hole.
- Center each the new sections in their holes on top of the mounds. Spread out the roots evenly down the mound so they reach down to the bottom of the planting hole. Mix mulch and fertilizer back in with the displaced soil, and back fill the hole. Tamp down the soil firmly with your fingers.
Irises
 Mature iris plants
Use a garden fork to dig up the large iris clump. Shake off all the dirt clinging to the rhizomes. Wash off all remaining soil with a garden hose.
- Use a sharp kitchen knife and start sectioning off pieces of the iris. Start at the edge of the clump. Try and cut where the rhizome has a natural indentation, between leaf fans. Each piece should include a fan of leaves on a 4- to 6-inch length of rhizome with some small roots growing off the bottom.
- Trim the leaves to 3 inches. Trim off any damaged parts of the rhizomes. Let the clumps dry in the sun for a few hours. Dig up the old iris bed. Add rich fertilizer and mulch.
- Dig individual holes in the beds for each section. In each hole, create a long mound. Place each iris section on its mound. The rhizome should lay on top of the mound, with any roots spread down the sides. Back fill the hole, covering the roots. The rhizome will still be visible just above the ground. Water the bed well and keep it moist.
Tips & Warnings
-
Iris sections grow in the direction leaves are located. On hillsides, plant iris with the leaf end pointed uphill.
-
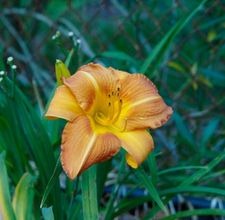
New varieties of daylilies include apricot and peach colors in addition to the standard orange and gold.
-
Always take caution when handling sharp instruments, particularly in wet, slippery conditions.
Deprecated: strpos(): Passing null to parameter #1 ($haystack) of type string is deprecated in /home/agriviek8Qv/agriviet.net/public_html/wp-includes/comment-template.php on line 2522