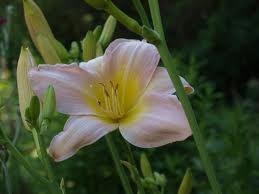

Hardy, drought-tolerant daylilies are among the world’s most popular perennial garden flowers. They offer a wide array of bloom color and shapes as well as different scents. Some are tiny with blooms no bigger than 2 inches, while others sport massive blossoms. Daylilies can be grown from seeds, division and by cutting sections of roots into new plants. For every gardener there is at least one daylily to love.
- Difficulty:
- Easy
Instructions
Things You’ll Need
- Daylily seeds
- Compost
- Slow release fertilizer
- Sand
- Mulch
- Large pot
- Shovel
- Water hose
- Pots
- Planting bed
- Mix the compost with enough bark mulch and sand to create a well-draining medium. Add the recommended amount of slow-release fertilizer suggested by the manufacturer. Add enough water to make the mixture moist but not soggy. Set aside for later.
- Carefully dig out several overgrown clumps of daylilies. Knock off as much soil as possible by dropping the clumps on the ground several times and shaking them vigorously.
- Rinse away all of the soil from the roots with a hose. A strong jet of water will not harm these hardy plants. Removing all of the soil will make checking for disease much easier. Look carefully for disease or rotting growth. Remove any problem areas.
- Tease out every baby daylily you can find by using your fingers and set them aside in a bucket of water. Use a clean, sharp knife to gently cut the larger daylilies apart. You can trim off the leaves or leave them intact. Remove any leaves that are yellowed or brown.
- Plant the daylilies in an area that receives several hours of sunlight a day. Use a shovel or tiller to turn the soil of the planting bed. Add several inches of compost to the area and turn it under. Fertilizer can be added to this area. Plant the daylilies so that all of their roots are covered in soil. Pack the soil around them down and then water in well. Add 2 or 3 inches of mulch to the entire daylily bed.
- Use the prepared compost soil in pots for the small daylilies. Add enough packed soil to fill the pots halfway and then place the daylily in the center of the pot. Backfill the pots with compost and then water the plants in well. Add a layer of mulch to retain moisture. Place the pots in an area that receives several hours of dappled shade a day. Do not allow the soil to dry out.
- Plant daylily seeds in the same mixture in either pots or plant flats. Bury each seed 1/2 inch deep and top with a thin layer of mulch. Place the seed flats in a sunny area and check daily for watering. Do not allow the seed trays to dry out or it could harm the tiny seedlings. Feed the seedlings with a water-soluble fertilizer when they have several true leaves.
- Fertilize daylilies every six weeks during the growing season with a water-soluble fertilizer. When the plants become very overcrowded, they can be divided and replanted into smaller clumps or rows. Check the plants once a month for aphids, thripes or any other diseases or pests.
Deprecated: strpos(): Passing null to parameter #1 ($haystack) of type string is deprecated in /home/agriviek8Qv/agriviet.net/public_html/wp-includes/comment-template.php on line 2522