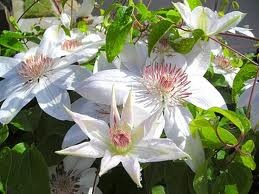

Clematis is a climbing vine that adorns trellises and fences in the sunny spots of many landscapes. Within the clematis genus, many varieties exist with different blossom colors, foliage colors, blooming time and growing heights. Once you find a clematis variety you enjoy, propagate it to spread the plant to new growing locations. You can root a clematis stem easily, especially if you take a cutting in the spring of the growing season. By the end of the summer, the cutting will root and you can plant it where you want it before autumn begins.
- Difficulty:
- Moderately Easy
Instructions
things you’ll need:
- Pruning shears
- 4-inch growing container
- Peat moss
- Sand
- Rooting hormone
- Spray bottle (filled with water)
- Gallon-size plastic bag
- Rubber band
- Take a cutting from a healthy and established clematis plant during the spring after the plant begins growing actively. Use the pruning shears to cut a stem approximately 6 inches from the end. If you find blossoms on the stem, cut them off with the pruning shears to leave only leaves on the stem. Cut the stem so it is approximately 3 to 4 inches long with two sets of leaves. Remove any leaves growing from the bottom inch of the stem.
- Fill the planting container to the top with 1 part peat moss and 2 parts sand, mixing the ingredients well.
- Dip the end of the stem into the rooting hormone to cover the bottom inch of the stem.
- Insert your finger into the center of the planting container to make a 1-inch hole. Place the clematis stem into the hole, inserting it 1 inch into the soil. Firm the soil gently around the stem to hold it upright.
- Mist the soil gently with the spray bottle to moisten it.
- Place the plastic bag over the container to create a humid environment for the clematis cutting. Secure the bag to the container with a rubber band around the rim of the container.
- Place the container in a warm location with temperatures approximately 70 degrees Fahrenheit. Indirect light is best for rooting — direct sunshine may damage the fragile cutting.
- Carefully remove the plastic bag every day and mist the soil with the spray bottle to keep the soil moist. Replace the bag after you finish watering.
- Continue to keep the soil moist with daily misting and watch for signs that the clematis stem begins to grow roots. When you see new growth on the stem, this indicates new roots are forming beneath the soil. This process will take at least one month and perhaps longer. Clematis varieties with large blossoms may take longer to root than small-blossomed varieties.
- Remove the plastic bag when you see evidence of rooting. Continue to water the soil in the container for another week. If it is still summer, transplant the new clematis plant outdoors in a permanent planting location. If it is autumn, transfer the new clematis plant to a larger container and grow it indoors over the winter. Transplant the clematis plant outdoors the following spring.
Deprecated: strpos(): Passing null to parameter #1 ($haystack) of type string is deprecated in /home/agriviek8Qv/agriviet.net/public_html/wp-includes/comment-template.php on line 2522