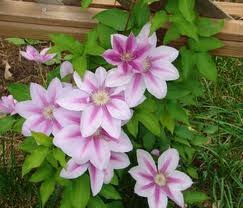

Available in hundreds of species and hybrids, the clematis can live for decades, producing showy flowers of white, pink or purple on its climbing vines. These flowers yield fluffy seed heads for planting, but the seed method of clematis propagation often fails, and the resulting plant might be unlike its parent. For these reasons, most backyard gardeners propagate their clematis plants by taking cuttings or layering.
- Difficulty:
- Moderate
Instructions
things you’ll need:
- Established clematis plant
- Sharp knife
- Root hormone
- Small pot
- Peat moss
- Sand or grit
- Plastic bag
- Compost
- Wire hooks
Taking Cuttings
- In May or June, prepare a pot for planting. Mix one part sand or grit and one part peat moss, and pour it into the pot. Set it aside.
- On the mature clematis plant, locate a leaf joint on a half-green portion of stem. The term "half-green" refers to growth from the prior year that is neither woody with age nor soft and green like new growth. A leaf joint is the point where a leaf stem joins with the main stem.
- About 2 inches below the leaf joint, cut through the main stem.
- Make a second cut through the main stem just above the leaf joint, as close to the joint as possible. The slightly more than 2 inches of remaining stem, along with any attachments to those 2 inches, comprise the new cutting.
- To help conserve moisture inside the cutting, trim away leaves and stalks from one side of it, and remove all but two leaves on the other side. Dip the base of the cutting in root hormone.
- Dig or poke a narrow hole in the prepared pot of sand and peat moss. Without forcing it, gently insert the stem and pat the soil securely around it to support the plant. Most of the main stem should be buried in the soil.
- Water the cutting thoroughly at its base, cover lightly with the plastic bag, and store in a light, protected place but not in direct sunlight. With regular watering and care, the cutting should be ready to plant outside in a year and should produce flowers the following year.
Layering
- In early autumn, locate a stem of the prior year’s growth on the mature clematis plant. It should be long enough or low enough that the half-green portion can be easily manipulated to touch the ground. Trim any leaves from this part of the stem.
- Prepare the soil where that stem touches the ground. While taking care not to disturb existing roots of the clematis, dig a trench about 8 inches deep by 1 to 2 feet long.
- Mix equal parts natural soil and compost in a quantity great enough to refill the trench. Pour only half of it into the trench and set the remaining soil mixture aside.
- On the portion of stem that touches the ground, locate a leaf joint where a leaf stem was removed. Cut a notch near it.
- Gently bend the stem toward the ground, notch side down. This should slightly open the freshly cut notch in the stem to encourage root growth. Keeping that notch open, secure the stem inside the trench, using wire hooks on both sides of the notch. Cover with the remaining soil mixture, patting it firmly around the buried stem.
- Water thoroughly. After 12 months, the plant should be fully rooted and can be detached from its parent plant.
Tips & Warnings
-
Instead of digging a trench for layering, consider securing the notched stem inside a buried pot filled with soil and compost. After a year, detach the old plant and carefully dig up the pot with its fully rooted — and already potted — new clematis.
-
Always use a sharp knife, and make clean cuts. Ragged cuts leave stems open to fungal infection, like wilt.
Deprecated: strpos(): Passing null to parameter #1 ($haystack) of type string is deprecated in /home/agriviek8Qv/agriviet.net/public_html/wp-includes/comment-template.php on line 2522