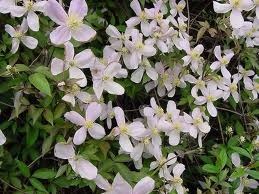

Clematis is a perennial climbing vine, valued for its versatility and colorful blooms in a variety of sizes, shapes and colors. While most gardeners plant starter clematis vines available in garden centers, planting clematis by seed provides an opportunity to observe every stage of plant development. Harvesting seeds from existing plants at the end of the growing season is especially interesting. The wispy, spider-like seed heads are easy to recognize after the clematis blooms wilt in late autumn.
- Difficulty:
- Moderate
Instructions
things you’ll need:
- Household shears
- Tray or plate
- Tweezers
- Paper envelope
- Watch for seedheads to develop at the base of wilted blooms in late summer or early autumn. Allow the seedheads to dry on the clematis vine as long as possible. Snip a few seedheads when the heads become dry and fluffy.
- Trim the long, wispy tails from the seedheads with a sharp, clean pair of household shears, then shake the seedheads to release the seeds. If the clematis seeds are still green, spread the seeds on a tray or plate. Place the tray in a warm, well-ventilated location until the seeds are brown and dry. The seeds must be completely dry, as green seeds mold during storage.
- Sort the clematis seeds from plant debris with a pair of tweezers. Place the dry seeds in a paper envelope. Write the type and color of the clematis plant on the envelope. Include the date of harvest and any other helpful information.
- Store the clematis seeds in a dry location until spring.
Tips & Warnings
-
Clematis seeds must be stratified, or chilled, before planting. To stratify, place the clematis seeds in a zip-close bag with a handful of damp peat moss or sand. Chill the seeds in your refrigerator for 30 to 90 days before planting.
Deprecated: strpos(): Passing null to parameter #1 ($haystack) of type string is deprecated in /home/agriviek8Qv/agriviet.net/public_html/wp-includes/comment-template.php on line 2522