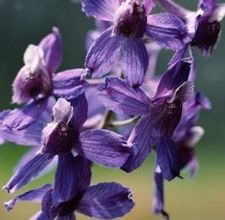
Achieving those gorgeous indigo-blue flowers on your Clematis integrifolia Durandii starts with a successful planting. All clematis like an organic, rich, well-draining soil to encourage the development of a strong and deep root system, and durandii is no exception. Unlike many clematis, integrifolia is a herbaceous perennial and it will die down to the ground each winter. Also, integrifolia is a type of clematis that is not prone to a serious clematis disease called clematis wilt, so it does not need some of the extra precautions that other clematis require.
- Difficulty:
- Moderate
Instructions
things you’ll need:
- Shovel
- Tarp or wheelbarrow
- Gravel (optional, if you have clay soil)
- Lime (optional, if you have acid soil)
- Bucket
- Water
- 6-foot trellis or obelisk and ties (optional)
- Compost
- Finely shredded bark mulch
Get Ready
- Choose a site in sun or partial shade. Filtered sun is ideal, but this clematis is adaptable to most conditions. When grown in full sun, keep the root area shaded and protected from intense all-day sun. Use mulch or other plants for this purpose. If the site is too shady, there will be fewer blooms.
- Decide on a support system. Clematis integrifolia will grow 4 to 6 feet tall, so it will need a trellis or obelisk to grow on. Alternatively, it can scramble across the ground or on nearby shrubs, so consider its neighbors in your planting design, taking into account various heights so you do not obscure the blooms.
- Remove the plant from its container and inspect the size and condition of the root ball. If there is a stake or trellis holding the foliage, leave it in place for now. If there are massive amounts of roots and they are very crowded and wrapped tightly around the soil in a circle, slice the roots a half-inch deep in four places from the top of the root ball to the bottom. Loosen them as much as possible. This will encourage new root growth out into the improved soil.
- Wash off the majority of the potting medium and let the roots soak in a bucket of water while you prepare the planting hole.
Prepare the Planting Hole
- Dig a hole about 18 inches wide by 18 inches deep, removing the native soil to a tarp or wheelbarrow for further amending. Clematis require a large planting hole. If the subsoil is clay, add a few inches of gravel to the bottom of the hole for improved drainage.
- Mix in compost with the native soil at a 50-50 ratio.
- If your soil is acid (below 6.0 pH), mix in a cup of lime to the amended soil.
- Fill the planting hole halfway with the amended soil and lightly tamp the soil with your foot to remove air pockets.
- If you have decided to grow the clematis on a support, insert a trellis toward the rear of the hole or insert an obelisk in the center of the hole.
Plant It
- Insert the plant in the hole, adjusting the height of the crown to be level with the top of the soil. Add soil as needed. If the plant is bare root or nearly bare root, create a mound of soil in the hole and drape the roots over the mound so the roots make good contact with the soil.
- Continue adding the amended soil around the root ball while lightly tamping until the soil level is even with or slightly higher than the surrounding grade.
- Water thoroughly to settle the soil. Add more soil if necessary.
- Carefully remove the foliage from the temporary stake that came with the plant and remove the temporary stake. Add soil to fill any voids that the stake created. If there is too much foliage to remove without damaging it, you can remove the temporary stake next year when you cut the plant back for the winter.
- Lean the stems on the new support and attach them. Clematis integrifolia is not a clinging variety, so you will need to tie the stems to the new support manually.
- Add a 2- to 3-inch layer of finely shredded bark mulch around the planting hole to keep moisture in and weeds out. Do not let the mulch touch the stems directly.
Tips & Warnings
-
Keep the plant moist, especially the first two years as it becomes established.


Deprecated: strpos(): Passing null to parameter #1 ($haystack) of type string is deprecated in /home/agriviek8Qv/agriviet.net/public_html/wp-includes/comment-template.php on line 2522