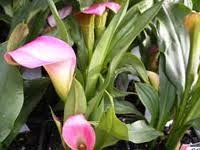

Florida gardeners statewide can grow calla lilies (Zantedeschia spp.). North and central Florida gardeners will have the best success growing it outdoors as a perennial, as the area’s temperatures are cooler. Gardeners in the south should treat it as an outdoor annual or grow it inside containers. Depending on the cultivar, foliage is green to spotted and the flowers come in white, pinks and yellow. This clumping, herbaceous perennial spreads by underground rhizomes.
- Difficulty:
- Moderately Easy
Instructions
things you’ll need:
- Rake
- Compost
- Peat
- Manure
- Shovel
- Hand trowel
- Mulch
- Fertilizer
- Pruning shears
- Container
- Potting mix
Outdoors
- Remove unwanted vegetation from a planting site located in partial shade. Amend the site’s soil with a 4-inch layer of compost, peat or manure, working it into the soil 4 inches. Calla lilies prefer rich soils and the majority of Florida soil is sandy and nutrient-free.
- Work 12-4-8 bulb fertilizer into the planting site’s soil, applied according to package instructions. Dig it down approximately 3 to 4 inches.
- Dig a hole 3 to 4 inches deep and as wide as the rhizome, using a hand trowel. Space multiple calla lily planting holes approximately 1 foot apart.
- Place the calla lily rhizome into the hole and cover with soil. Pack the soil down with your hands.
- Water after planting, saturating the rhizome, and keep the soil moist, but not soggy. Withhold water once the calla lily’s foliage dies and the plant goes dormant.
- Apply a 3-inch layer of mulch over the planting site. It helps retain soil moisture, decreases unwanted vegetation and protects plants during winter in north Florida.
- Fertilize the calla lily approximately one month after planting. Use a 12-4-8 blend and spread around the plant, not allowing it to touch the foliage. Apply according to package instructions.
Containers
- Fill a container with a rich, well-draining potting mix and press down on the soil to firm it up. Select a 1 gallon container for planting one rhizome, a 2 gallon container when planting two and a 3 gallon container when planting three rhizomes together.
- Press the calla lily rhizome into the soil to a depth of 3 to 4 inches. Cover the top of the rhizome with soil.
- Water the container until water runs out of its bottom. Wait one week before applying more water. Keep the container’s soil moist, but not wet or the calla lily will rot and die. Withhold water when the foliage starts dying and the plant goes into dormancy.
- Place the container in a partially shady location outdoors or in a lighted area indoors. The rhizome should produce growth in approximately two weeks.
- Fertilize with a water-soluble, 12-4-8 fertilizer once the calla lily germinates and repeat the fertilization in approximately four weeks. Prune off spent flowers before seeds form, if growing the calla lily as a perennial. Allowing flowers to develop seeds cuts down on future flower production.
Tips & Warnings
-
Dig up rhizomes for winter storage after the foliage dies. Allow the rhizomes to air-dry in a shady area and store in a dry, dark, well-ventilated area until fall.
-
Calla lilies bloom in fall in south Florida and in spring in north and central Florida.
Deprecated: strpos(): Passing null to parameter #1 ($haystack) of type string is deprecated in /home/agriviek8Qv/agriviet.net/public_html/wp-includes/comment-template.php on line 2522