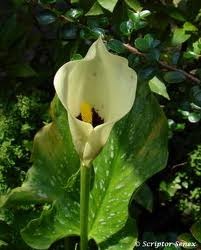

Calla lilies are beautiful in the garden, but they can also be stubbornly hard to eliminate from an area where they are unwanted. Calla lilies grow from bulb-like rhizomes under the soil line. Left unattended, the rhizomes divide each year, naturally expanding the size of the calla lily colony. To get rid of calla lilies, proper digging and removal of the root system is crucial to success.
- Difficulty:
- Moderately Easy
Instructions
things you’ll need:
- Shears
- Shovel or garden fork
- Basket or bucket
- Cut all the foliage and flowers down to about 1 inch above the soil line. Use sharp shears to cut through the fleshy foliage.
- Place a shovel or garden fork 6 inches from the edge of the calla lily colony. Press down on the shovel to sink it into the ground then pull back on the handle to lift the rhizomes from the soil.
- Brush off the soil from around the main rhizome clumps, and place them in a basket or bucket for easy removal from the site.
- Continue digging out and removing the calla lily rhizomes throughout the area.
- Go back through the area and carefully search for any pieces of the rhizome. Sections left in the soil will sprout in the next growing season and will quickly multiply.
- Remove any new plants that were missed each growing season. Calla lilies are difficult to eliminate, and it make take several years to remove them completely.
Tips & Warnings
-
Calla lilies grow year-round in USDA hardiness zones 8 and higher. In colder climates, the rhizomes will die out each year if not removed and stored for the winter. The rhizomes may survive over winter in zone 7. In all other zones, the plants will die out at the end of the growing season.
Deprecated: strpos(): Passing null to parameter #1 ($haystack) of type string is deprecated in /home/agriviek8Qv/agriviet.net/public_html/wp-includes/comment-template.php on line 2522