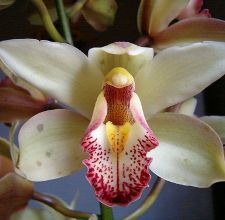

Cymbidium orchids are terrestrial plants consisting of more than 40 different species native to Asia and Australia. Cymbidiums can be grown outdoors when the temperatures are warm, but should be brought indoors during winter. They produce thick, waxy flowers during the winter months, usually when the nighttime temperatures are around 50 degrees F. The flowers can last for several months, but once they’ve faded, it’s safe to divide the orchids. Division is only necessary once every three to four years, or when the pseudo bulbs become crowded. Once divided, new cymbidium orchid plants will bloom in three to five years.
- Difficulty:
- Moderately Easy
Instructions
things you’ll need:
- Sharp knife
- Planting containers
- Orchid compost
- Remove the cymbidium orchid from its planter after it has finished flowering by placing your fingers around the base of the stem and gently lifting upward. Cut the pot away carefully using a sharp knife if it’s wedged in place by the large, fleshy roots of the plant. This happens if the orchid has not been re-potted or divided in several years.
- Look for natural divisions in the cymbidium orchid’s roots that allow for three- to five-bulb groupings. Pull apart the bulbs gently with your fingers, or cut them apart with a sharp knife, if necessary. Make sure each division has at least three bulbs attached for the best results.
- Select new pots which will allow the cymbidium orchids to grow unrestrained for at least three years, without the need for re-potting or dividing. Orchids don’t like to be disturbed too often. Choose planters that allow at least 2 inches between the plant and the side of the container for the best results.
- Add ¼ to ½ inch of orchid compost to the bottom of each container, and then place a division on top of the mixture. Place the cymbidium orchid bulbs so that they are partially submerged in the compost, burying only about ¼ of each bulb. Make sure that the newest growth is centered in the pot so the plant can spread as far as possible.
- Secure the newly-divided cymbidium orchids in place by pressing the compost down with your fingers to compact the medium around the bulbs. Make sure each division is firmly in place and not loosely sitting in the compost.
- Place the cymbidium orchids in a shady location after dividing and water thoroughly. Water again once every two weeks for the next ten weeks. The new plants will develop roots within ten weeks. Move them to an area of bright, indirect light after roots develop, and increase watering to at least once per week, or anytime the soil begins to dry.
Tips & Warnings
-
Inspect the roots thoroughly and discard any dead roots or damaged bulbs prior to dividing. Specialized orchid compost can be purchased at local home and garden centers. Try holding a cymbidium orchid division in the container with one hand while adding the orchid compost with the other if you’re having trouble burying the bulbs. Always make sure the top ¾ of the bulbs are above the surface of the soil.
Deprecated: strpos(): Passing null to parameter #1 ($haystack) of type string is deprecated in /home/agriviek8Qv/agriviet.net/public_html/wp-includes/comment-template.php on line 2522