
Bleeding heat bulbs resemble colorful strings of lights when they bloom. They offer gardens an elegant touch, which has made them a staple flower for cottage gardens. These types of plants are fairly hardy, yet can die in extreme frosts. Choose a time in early fall to plant your bulb. Find a location that has well-drained soil and receives partial sunlight. Find out how you can plant bleeding heart bulbs as a gorgeous addition to your garden.
- Difficulty:
- Moderate
Instructions
things you’ll need:
- Shovel
- Fork
- Rototiller
- Mulch
- Peat moss
- Fertilizer
- Choose a planting site and watch the location after it rains. If puddles still exist on the site after 5 hours, pick a better draining location. You can also amend the soil for better draining by using peat moss. Work into the first 12 inches of soil using a fork or rototiller.
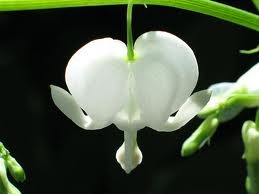
- Make sure your planting area gets shade if you are planting white bleeding hearts, and partial sunlight for pink bleeding hearts.
- Dig a hole twice the height of the bulb. Place your bleeding heart bulb root down into the soil. Allow your bulbs 2 to 3 feet of growing space. Pack soil over the bulbs.
- Spread 6 inches of mulch over the growing area. Water thoroughly. Remove the mulch after the last frost. The mulch helps lock in moisture and keep the ground warm.
- Water your bulbs every week during the growing season. Fertilize bulbs in the spring with a slow-release fertilizer.
Tips & Warnings
-
Plant bulbs 6 to 8 weeks before the first frost.
-
Avoid fertilizing bulbs when planting to prevent burning the bulbs.
Deprecated: strpos(): Passing null to parameter #1 ($haystack) of type string is deprecated in /home/agriviek8Qv/agriviet.net/public_html/wp-includes/comment-template.php on line 2522