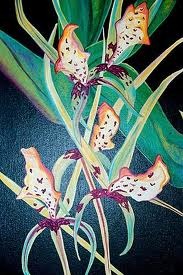

Brassia orchids originate from Mexico, Brazil, Bolivia and the Caribbean regions. With attentive care, they may successfully be grown in an indoor garden or windowsill. There are over 30 named species of Brassia within the orchid genus Oncidium. Place this type of orchid plant in an area where it will receive indirect but bright light.
- Difficulty:
- Moderately Easy
Instructions
things you’ll need:
- Flowerpot
- Measuring cup
- Measuring spoon
- Bucket
- Orchid potting mix
- Horticultural charcoal
- Dump soil-free orchid potting mix into a flowerpot until it is full up to 1 inch from the rim. Remove the potting mix from the flowerpot one cup at a time, keeping count of the cups and placing the mix in a bucket.
- Add 1 tbsp. of horticultural charcoal per cup of potting mix into the bucket and stir by hand to combine the components. Add 1 tbsp. water per cup of potting soil and stir again so the mixture is slightly damp.
- Fill the bottom of the flowerpot with the potting mix, creating an elevated mound in the center of the pot.
- Separate the roots of the Brassia orchid gently by hand. Set the center of the orchid plant on top of the mounded potting mix. Spread the roots out and down the sides of the mound.
- Cover the roots with potting mix. Tamp down gently to hold the plant in place. Fill the pot with additional potting mix up to within 1 inch of the pot’s rim.
Tips & Warnings
-
For Brassia orchids, use orchid potting mix with medium-grade chunks of bark and vermiculite.
-
Do not water newly planted Brassia orchids for at least two weeks. Keep the humidity elevated by setting the newly potted plant on a tray of gravel with water in the bottom.
Deprecated: strpos(): Passing null to parameter #1 ($haystack) of type string is deprecated in /home/agriviek8Qv/agriviet.net/public_html/wp-includes/comment-template.php on line 2522